1. INTRODUCTION
This document is the end result of some experimentation with fibreglass moulds (or molds for our American friends). I had never worked with fibreglass beyond basic bodywork, and certainly nothing on this scale.
After fruitlessly searching for a pre-made mould that was large enough -- and driving the folks at Home Depot nuts asking about BIGGER globes for light fixtures -- I finally took a cue from the mould pictures on Jackal's Gym. I've never actually seen those moulds, but I'm pretty sure that mine are identical.
I've tried to include every step. This means that there may actually be more detail than the average person needs to complete the project, but hopefully sufficient detail that the total construction newbie can also finish.
*** Please note: I wrote this article long before Steve Slater made his Atlas Stone Moulds. It is a LOT easier -- and cheaper -- to buy your moulds from Steve. They are available at: http://www.slatershardware.com/stonemolds.html. For those who prefer a challenge, keep reading!
Return to Top
2. STONE SIZES AND WEIGHTS
Exactly how big do we want to make our moulds?
Let's assume that our stones will be 100% concrete, keeping in mind that the density of concrete is approximately 142 lbs per cubic foot.
The formula that we would use would be Volume of a sphere = 4/3 pi r^3, with r = radius
To save some time, I've written the two calculators below. Enter either the desired radius (keeping in mind that radius = half of diameter) in the upper calculator, or the desired weight into the lower calculator. When you have arrived at satisfactory figures, note down the relevent radius or radii for the next step.
Return to Top
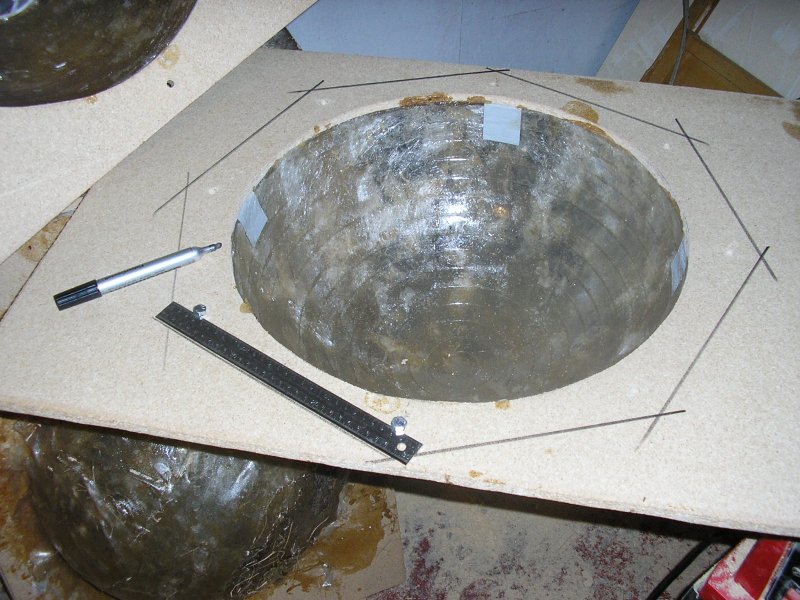
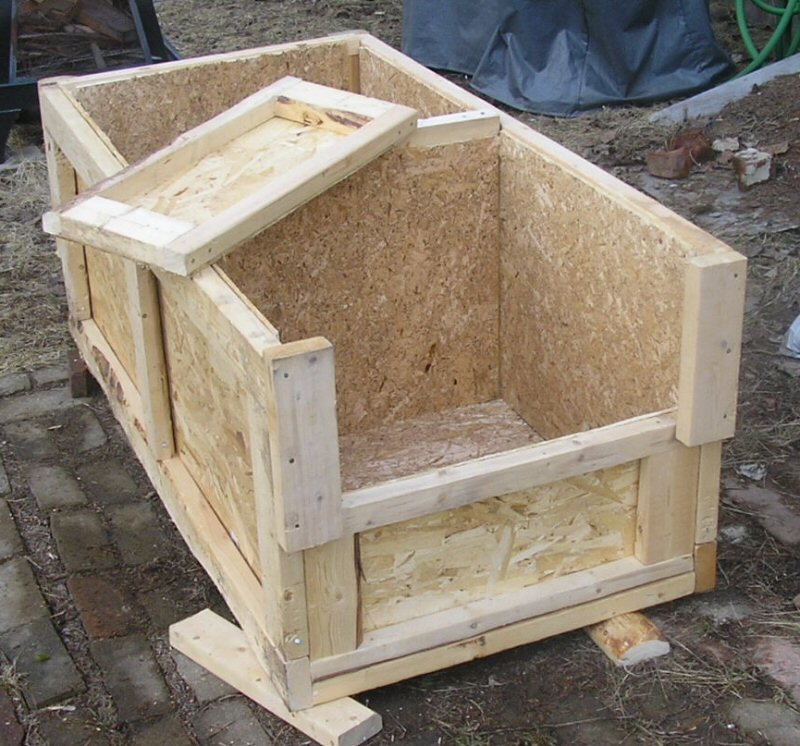
3. FORM CONSTRUCTION
required: drill, 1/2� spade bit, 1/4" and 7/32" wood bits, jigsaw, one foot length of 1x2, four (4) 2� long bolts and nuts, ruler or tape measure, one (1) wood screw, pencil, 1/2" plywood (TIP: Use good quality plywood, not particle board)
cut two pieces of plywood to appropriate dimensions. Leave plenty of room at each side
bolt together at edges
take the piece of 1x2, drill hole with 7/32" bit at one end for pivot
Measuring from the center of the pivot hole, mark the appropriate radius measurement or measurements from Step 2. Try to space them at least 1/4" apart.
Using 1/4" bit, drill holes
screw pivot into center of plywood
place pencil in appropriate hole, scribe circle. I used chewing gum to keep the pencil in place.
Using spade bit, drill pilot hole inside scribed circle, close to line
cut out with jigsaw. To prevent wood expansion from water, I recommend treating the exposed inner surface of the plywood with a water-repellent coating.
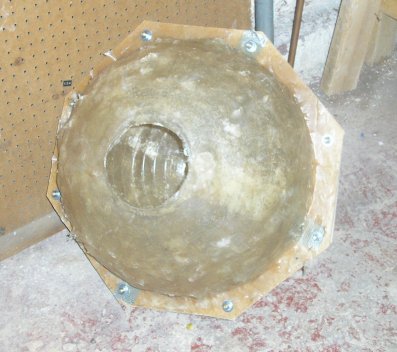
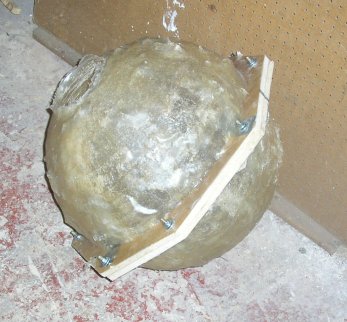
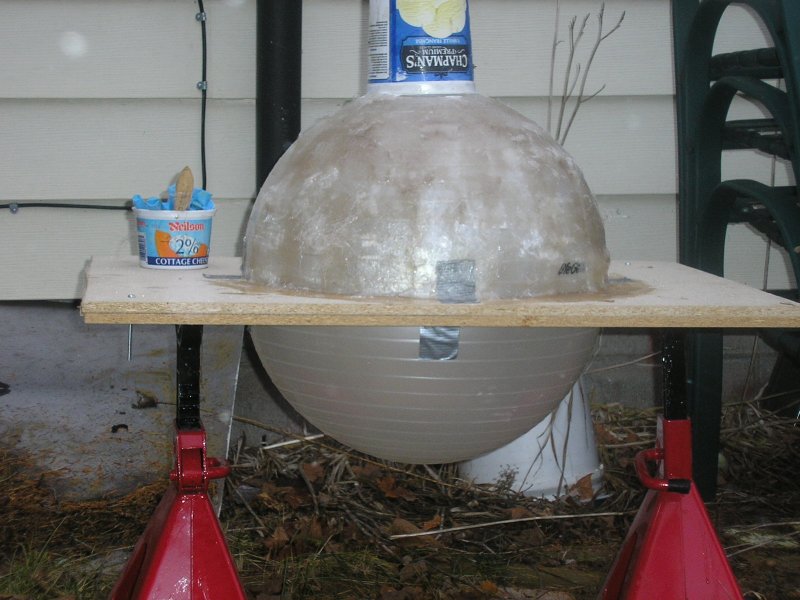
4. MOULD SETUP
required: inflatable ball, hand pump, duct tape, margarine/ice cream container or empty roll of duct tape
place underinflated ball into shell
ensure that ball is exactly centered with air hole facing up
pump up until ball just completely fills shell
using duct tape, place four small strips at quarters, top and bottom, to ensure that ball does not slip
place circular container with bottom cut out or empty duct tape roll over air hole
Return to Top
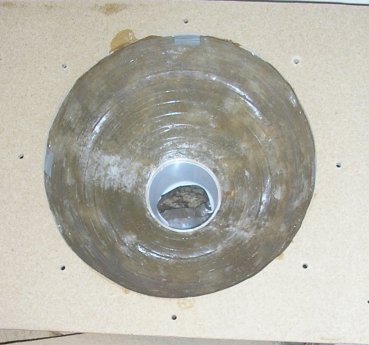
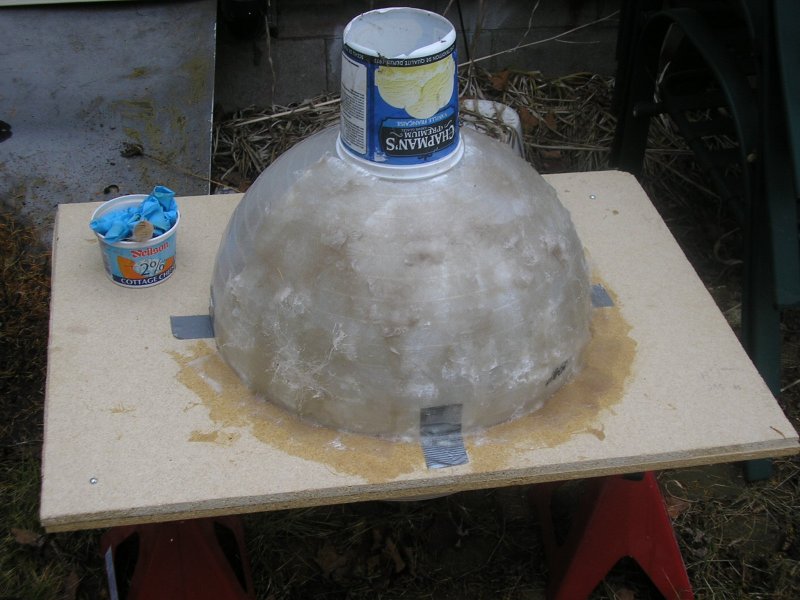
5. FIBREGLASSING
required: fibreglass resin (1 litre per layer), hardener, fibreglass matting, fiberglass cloth, paint brushes or sponges, mixing container, latex gloves, breath mask
How much fibreglass mat do I need?
Well...time for a bit of math.
surface area of sphere = 4 pi r^2
For a 19" diameter stone, radius (r) = 9.5" (half of the diameter)
Therefore, surface area to be covered = 4 x 3.1415926535 x 9.5 x 9.5 = ~ 1134 square inches
One square foot = 144 square inches
1134 divided by 144 = ~ 7.9
Therefore, we will need an absolute minimum of 7.9 square feet to totally cover our sphere for one layer. However, sections must overlap, and there must be some fibreglass mat on the wooden form, so just to be safe, let's assume an overage of 50%.
7.9 * 1.5 = ~ 11.8
Rounding up, we will need about 12 square feet of fibreglass mat for each layer.
Want to make it even easier?
|
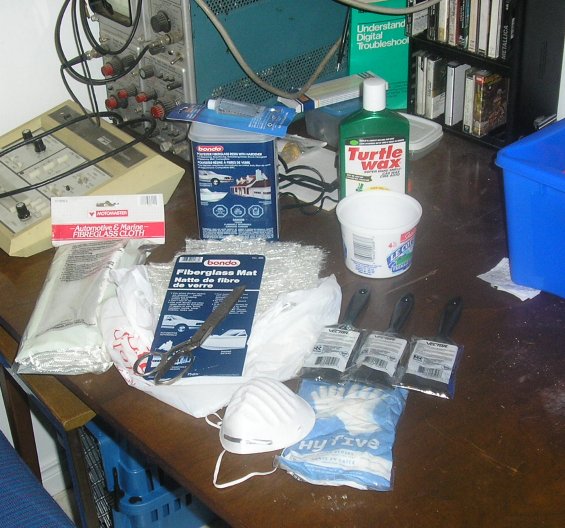
use latex gloves and breath mask
only use 250 ml of resin at a time (about 1/4 of can)
this will cover approximately 1/4 of ball (1/2 of section)
mix with hardener in disposable container
Be careful! Resin heats up considerably as it cures - do not get any on skin. Remove/clean up with acetone.
First layer:
start with fibreglass mat for first layer
pre-cut mat into ~ 6"x8" sections
apply resin to working area on ball = ~2 sections x 2 sections
starting at shell, press each piece of mat onto resined surface and apply top coat of resin with paintbrush or sponge
overlap mat as you go
don't forget to apply resin and mat to part of the wooden form surrounding the ball
replace resin container and paint brush after each section is completed
Second layer:
(if desired): as above
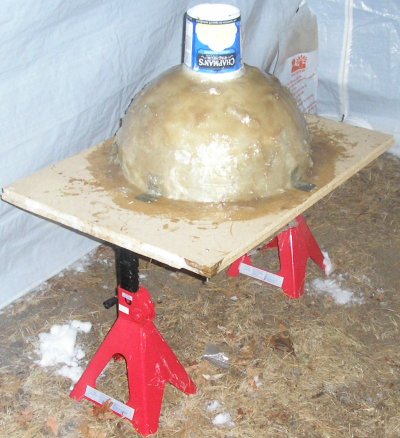
Third layer:
as above, but use fibreglass cloth instead for extra strength
apply resin liberally
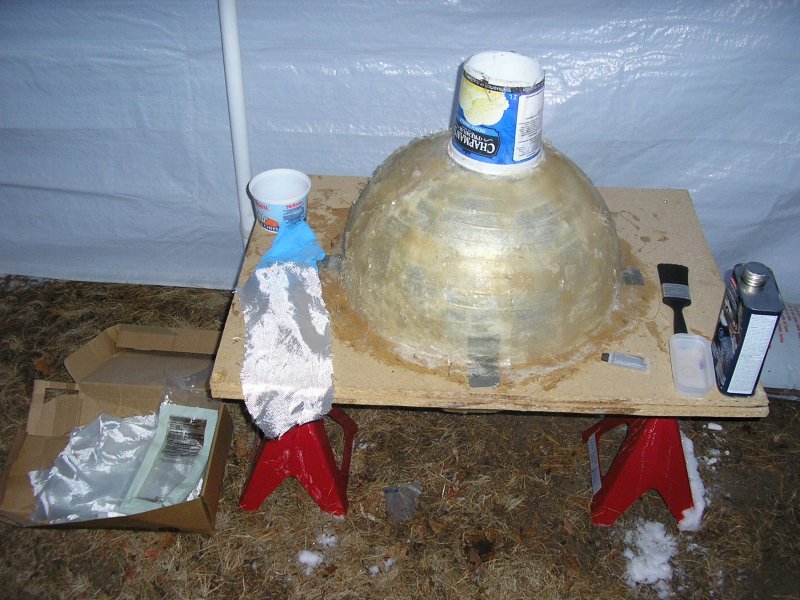
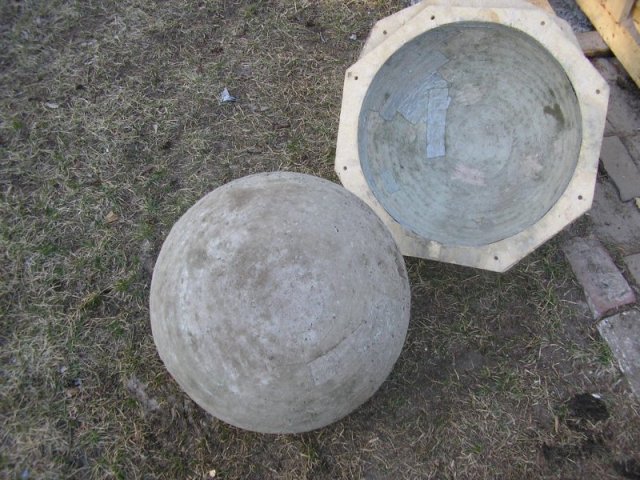
Let dry
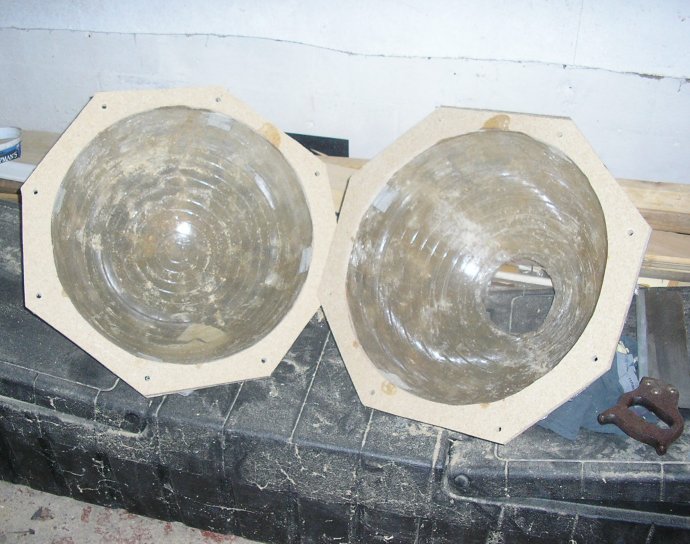
Remove ball